Check In
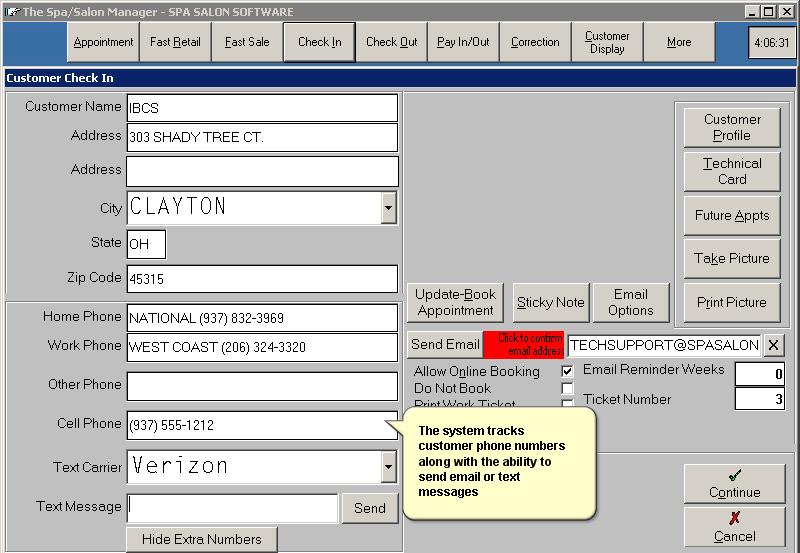
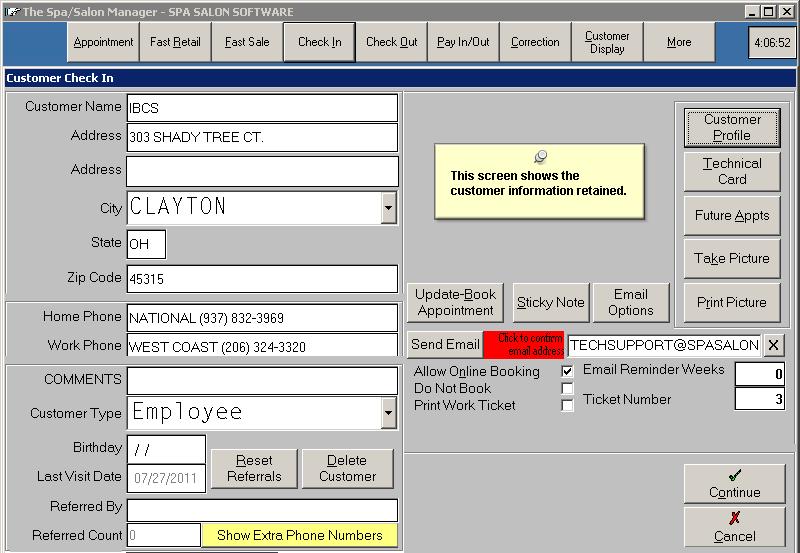
Customer Check In is accessed from the top of the Main Menu or by clicking on the client's name in the appointment book. The Check In screen allows you to enter the client's information with address information along with referral information. The system automatically completes the city name, state and zip code if they are entered into the maintenance section of the program.


Customer Names - How do I enter them?
Customer names are entered using last name followed by first name, the first and last name should be separated by either a space or a comma, but not both.
To
search by phone number, the number must be entered in the following format (937)
555-1212. Partial phone number searches are supported by entering just the area
code followed by the three digit exchange. Please note: The parenthesis are
required to search by phone number.
To
search by email address you must enter the email address in the customer name
prompt and include the ampersand @ sign. Near spellings are shown on the screen
to help you find the correct email address. This feature is useful if you get a
piece of mail returned to you without the customer's name.
As
a city name is entered, the system automatically searches to match the city name
to known names stored and displays the progress while typing. To accept the city found,
click the tab or enter key. The state is automatically displayed and if the city
has a unique zip code, the zip information is also completed. City, State and Zip
code information is setup under Maintenance, City Zip.
Customer
Phone information allows the customer's home and work number to be saved. In
addition, you can type extra information past the phone number such as Do Not
Confirm, Call After 10:00 AM or DO NOT BOOK. This allows you to notate the phone
number with additional information in which can aid in customer relations.
Provides a private area for comments regarding the customer
that do not display on the customer's Work Ticket unless specified under
Maintenance. This feature is useful to record driver's license information or
comments that you want the receptionist to see when checking in the customer.
Tracking
of Email Information allows the system to send Email reminders for confirmations
and mass mailings. Entering the email information should be in the format as
Name@Aol.com When confirming
appointments the system asks if you'd prefer to Email the customer. Email is
a fast, convenient and time efficient manner to communicate with your customers.
The
Advertisement information is shown for new customers only. This allows you to
track how new customers were attracted to your business. By tracking the
advertisement information you can determine where your advertisement dollars
should be focused. See Request for existing customers.
The
Request information allows you to track existing customers to determine whether
the customer asked for a specific employee or for a particular
service. This can be useful to determine which customers can be moved when an
employee is sick or requested by another customer.
Originally
the Ticket Number was used to track to the green ticket pads from yesteryear.
Some salons utilize the ticket pads, but most allow the computer to assign the
Ticket Number automatically. The Ticket Number does not affect the program
operation, it is used solely to track to a paper system.
The
Take Picture option is designed to work with the small egg shaped cameras made
popular by the internet. A picture of the customer can be associated with their
name and shown at Customer Check In or pictures can be taken and stored with the
Hair technical cards.
Print
Picture provides a way to print the pictures captured in the computer.
Technical
Cards allows the computer to store detailed information on the customer
regarding their hair, color, perm, nail and miscellaneous information. The
customer can have multiple technical cards and the system displays them in order
from the most recent to oldest. Technical Cards are invaluable when an employee is sick
and the customer requires that a service be performed for a special occasion.
The
Customer Profile provides a list of the services and retail items showing the
date, service or retail name along with the price charged. If a customer wants
to know when their last service was done, Customer Profile is the right
selection.
The
Delete Customer removes the customer's information from the system. All
information is removed including mailing information and technical cards. If you
want to change the customer's name do NOT use Delete Customer, instead click on
the customer's name and make the appropriate changes.
To merge two customer names together type in the incorrect spelling under Check In or Customer Display. Click on the name and correct it to the proper spelling. When you click Continue the computer will prompt you to determine if you want the two names merged together.
This section allows X-Charge/Accelerated Payments customers to store a credit card on file without that credit card being visible to everyone. You can then used these stored credit cards to pay for future credit card sales without re-swiping the card.
Click on the buttons below to continue this tutorial.