Check Out
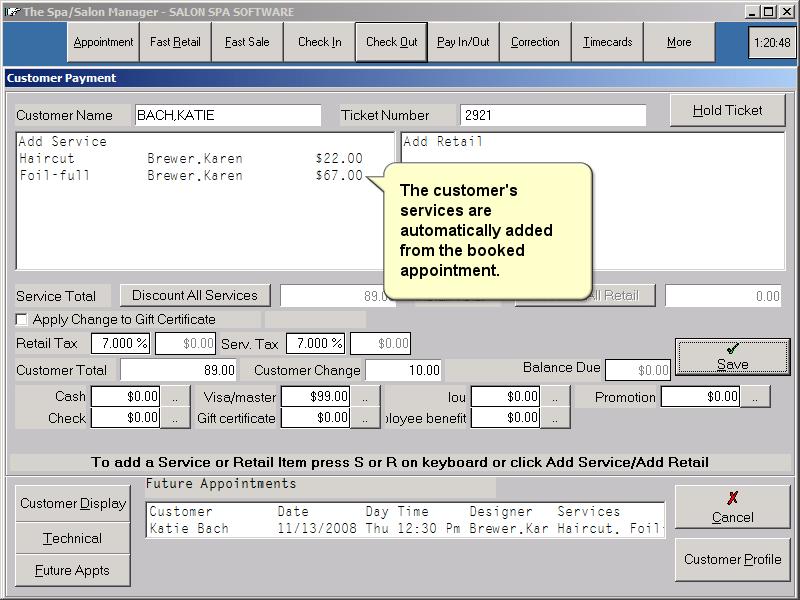
Customer Payment Screen
Choosing the Customer
Choosing the
Customer to be finalized can be done either by clicking on the customer name
listed in the box, sorted alphabetically, or by entering the ticket number that
was assigned during Customer Check In. Once the customer is selected, clicking
Continue retrieves the scheduled appointment information if present.
Family Check Out - Blog Explanation
Family Check Out
allows for multiple family members to be paid for by a single person. When selecting
the customers to check out, select all family members. A new box appears on the
Customer Check Out screen to specify the person that will be paying the bill.
Type the name or use the pull down arrow to select the person paying the bill.
The other family member's bills will be accumulated until the last family member
(the one selected to pay) is checked out.
Adding/Removing Service
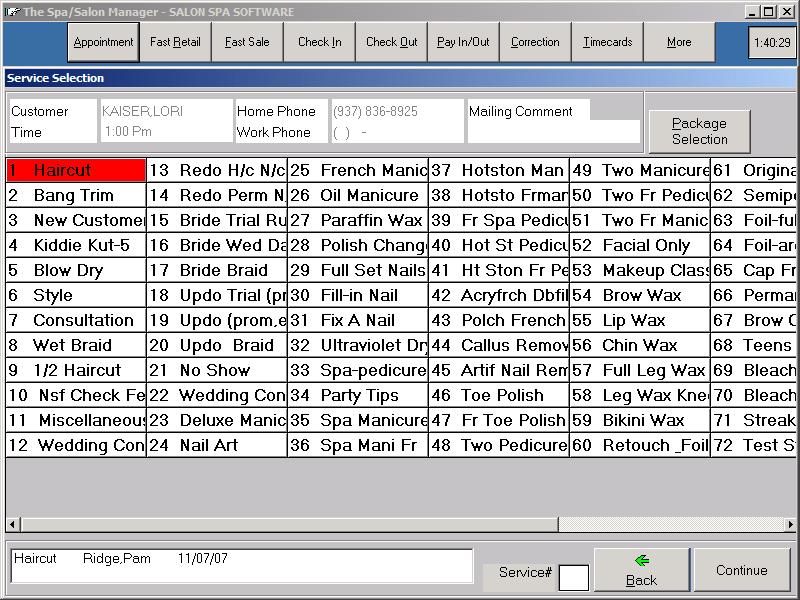
The Customer Payment screen automatically sets the services based upon their scheduled services. Services can be added or removed by pressing the Add Service. Once you have clicked Add Service, the service menu is displayed. A service price can be changed or a service completely removed by clicking on the desired service.

Services can be added by clicking or touching the desired service. The services work like a light switch, touching them the first time turns them on (red) and the second time you touch them they return to white and will not be included in the bill. If an employee does not do a particular service you will see blanks in the service which does not allow you to select services they do not perform.

Adding Retail
The Add Retail button allows you to either scan a bar code or type in a code number to enter products. The system can be set up in a variety of methods to determine who receives credit for the retail item. The system can either ask after each retail code, assign the retail to the salon, or ask once and set the employee based upon a single item. Whichever method your salon uses is okay.
Changing a Price or Employee Getting Credit
If you want to change the price or the employee getting credit you simply click or touch the desired retail item. The sales tax will be calculated on the final screen showing you the service total, retail total, tax and client total.
Once the services and retail are entered, the payment method is typed into the appropriate spot. If you have a cash drawer the system will open the cash drawer and display the amount of change for the customer. The system also can print a receipt at that time.
.. - Calendar or Keypad
The .. is used for to display either a calendar or number pad to help you enter information. The .. is displayed after a date or where an amount should be typed in.
Future Appointments
The Future Appointments provides a list of schedule appointments for the customer. A print button allows the list to be printed for the customer to take with them.
Customer Information
The Customer Information screen displays the address information for the customer including their email address. The customer information button allows this information to be updated from a variety of places in the program.
Technical
Cards
Technical
Cards allows the computer to store detailed information on the customer
regarding their hair, color, perm, nail and miscellaneous information. The
customer can have multiple technical cards and the system displays them from
most recent to oldest. Technical Cards are invaluable when an employee is sick
and the customer requires that a service be performed for a special occasion.
Customer
Profile
The
Customer Profile provides a list of the services and retail items showing the
date, service or retail name along with the price charged. If a customer wants
to know when their last service was done, Customer Profile is the right
selection.
Click on the buttons below to continue this tutorial.